Wednesday 9 December 2015

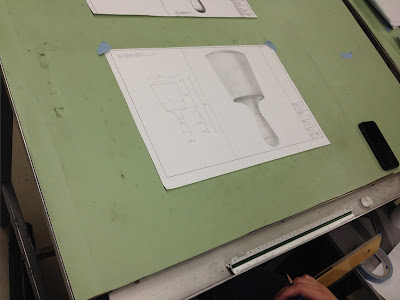
Keeping a Clean page!

 Student Ya-Fen Huang has some advice

Ya-Fen Huang                                                                                      8 December 2015 at 23:16


Do you remember the once millions time your mom nagging at you with the peachy voice
"Lift up your feet when you walk".
"Clean up right behind you"
Yea!!
If you like to have clean drawing
Do what you told
"Lift up your ruler while you draw"
"Brash away the eraser crumb with Kleenex right away"


Another student drawing without smudges by Vic.  What a clean page :) 


- Ya-Fen cont.
After all the rules I set up for the drawing
I am so proud of myself
when I finished my second drawing
It's not because my drawing skill are improve
It's Because my second drawing is ..... Much Cleaner ....
And guess what is even more important tip I found after All the trouble I think I went through
the real reason make my drawing cloudy,
Is Because I am too cheap to get the 2h pencil
Hihii       Yes!!

Thank you  Ya-Fen.
Future students will benefit from your wise advice.

Thursday 19 November 2015

Architectural Drawing Symbols


 It is conventional to use Architectural Symbols when Drawing furniture plans


 These are what lines look like that we use to draw objects,


and these are lines used to indicate boundaries or orientation.


 Extension lines are coupled with Dimensions
* I prefer slashes because of neatness


Now that you are competent enough to produce an Orthographic drawing with 3 views ( two elevations and one plan view ), your plans must have symbols which let someone else easily navigate them.

On the first orthographic which is essentially an outside view, add this symbol to the page.
Descriptions and information will be written on the top and (if necessary) bottom of the line
 The circle will hold numbers which help us navigate the plans. 
The top number will be the drawing number and the bottom will be the page number that drawing is found.
In the example below, the top number is 01 because it is the only drawing on the page.
The bottom number is D-0. This is page 0
 Now let's turn to the second orthographic page ( D-1) you have drawn. Which is essentially the same except with sectional (x-ray) views. On this page you will title all 3 views (2 elevations and 1 plan)*.
Note that I have divided up all 3 drawings and thus numbering them a separate drawings in the top of the circle
  1. Top sectional plan
  2. Front Sectional elevation
  3. R.Side Sectional elevation
All 3 drawings are found on this page D-1 as indicated in the bottom of each circle.
  *remember what a plan view is and and elevation


 Now let me introduce other symbols
"Reference Drawing number" means page number for each of your drawing packages. That's where I get the 'D' from in D-0 and D-1 and so on.


Circles with arrows or triangles on them indicate the point of view of which the object it is referring to is observed. In other words, Imagine you are standing inside the circle and facing the same direction as the arrow.


Section lines cut through objects and indicate which drawing on what page this point of view can be found
 Portions of objects like can be circled and then drawn at a much larger scale on a separate page.
Cabinetmakers often circle and draw joints in full scale this way for clarity and reference.
Notes and revisions in the side column should be numbered and referred to with these Symbols


Start by figuring out where to draw a section line and section reference on page D-0 that would illustrate the point of view Sectional elevation 02 on page D-1 is.

After you have successfully done this and shown your teacher, go ahead and so the same for Sectional elevation 03 and sectional plan 01.


Wednesday 18 November 2015

Centering an Isometric Drawing and Types of Perspective


 Where to start?
Click in this link to see how to center Center an Isometric Drawing.
Picture the object you are drawing as a cube.
Even this sofa (couch) can be represented as a cube. As long as we can determine it's OVERALL height 36", length 84" and width (or depth ) 59", it is possible to center it on our page and begin drawing layout lines.

Below is a link to a short video explaining the same page centering technique


There are other ways to Present your Isometric Drawing.


It can be Perspective, Oblique (cavalier) or Oblique (cabinet*) 
Perspective drawing is not taught in this module. But the oblique sketches are much more handsome than regular Isometric. You may want to Attempt Oblique Drawing.


*Cabinetmakers would probably gravitate to this presentation. Though keep in mind you may have to make some adjustments to the page centering method to accommodate the shorter depth of the object.

One and Two point Perspective


Perspective drawings have vanishing points. Here we have examples of one or two perspective vanishing points. It is called a perspective form of isometric drawing because it simulates the way our human eyes see the world. Note the Horizon line leveling the two points simulating our perspective here on earth. Now try not to think about weather or not we are all living in a simulation. Stay away from it, it's a rabbit hole. 

Click in the Image above to see a short video 


Later on when we explore Sketchup this Perspective / Paralell Lines function can be turned on and off. we will also note the horizon line in some styles and templates to help us draw in 3D